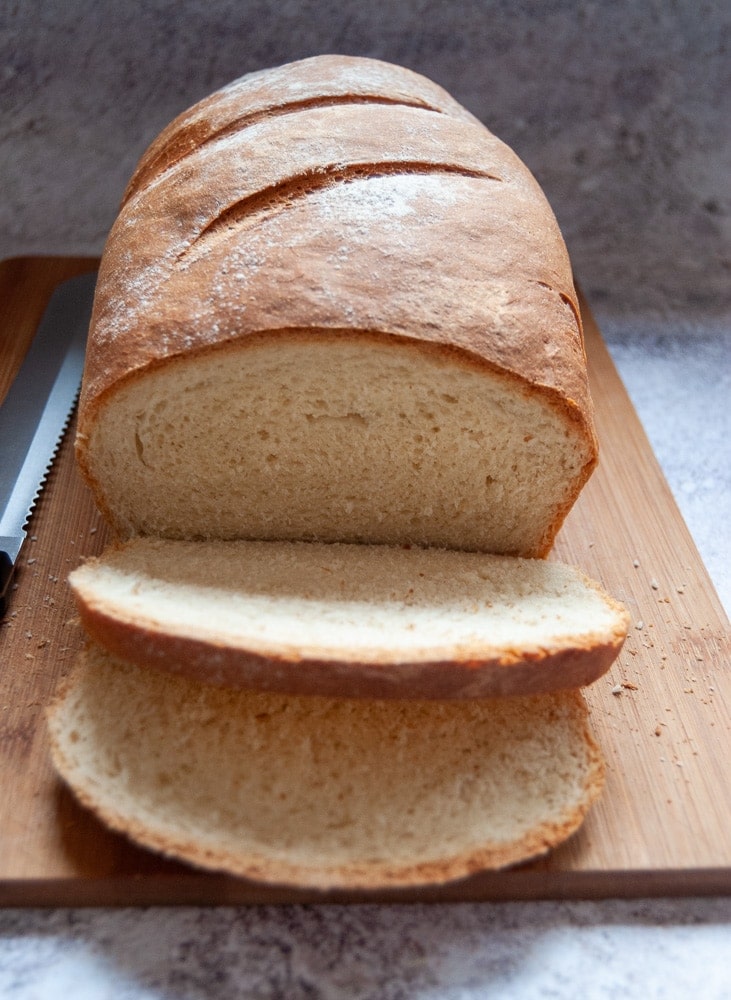
This soft white sandwich loaf is soft, fluffy and so easy to make – even if you’ve never made bread before!
A few years ago, I got into bread making in a pretty big way. At one point I was making 3-4 loaves a week! When I became pregnant my kitchen activity was severely curtailed. From about 5 months into my pregnancy I was struggling with really bad pelvic girdle pain, so standing in the kitchen baking was the last thing I felt like doing.
I did really miss baking bread though, and I’m hoping to get back into it properly this year.
benefits of making your own bread
Making your own bread has so many benefits! Here are just a few:
1. Kneading dough is such a great stress reliever. Admittedly, most of the time I use my stand mixer to do the hard work – but I always like to do a little kneading by hand. It brilliant for releasing any pent up anxieties. I like to listen to the radio or an interesting podcast while I’m kneading – I find it pretty relaxing.
2. No nasties. I’m not going to pretend I don’t buy sliced bread on a weekly basis – I have 2 hungry teenagers to feed! But when you bake your own bread, at least you know exactly what is in it. No additives to make it last longer and you can control how much salt goes in, if you’re worried about that kind of thing. You could also use half wholemeal flour or add seeds, herbs or nuts. The options are pretty endless.
3. Fresh, just out of the oven warm bread with lots of salted butter is one of the best things in the world ever. Fact.
4. It’s much easier than you think.
tips for making a perfect homemade loaf
If you’ve never baked your own bread but are worried it won’t turn out right, please don’t be scared – just give it a try. My first loaf was inedible – it was as hard as a brick! I didn’t let that put me off though – I was determined to produce a decent loaf that wouldn’t result in a broken tooth if you tried to bite into it.
The only thing I would say you need when making your own bread is patience. Sometimes the dough will take a bit longer to rise than a recipe states – when I first started baking, I used to wrongly think that was an indication that there was something wrong with the recipe. Sometimes it takes an hour, sometimes two, other times 2 1/2 hours.
One thing to remember though is you can absolutely pop the dough in the fridge for a slower rise – it won’t kill it! Some people actually think doing this improves the texture of the finished loaf.
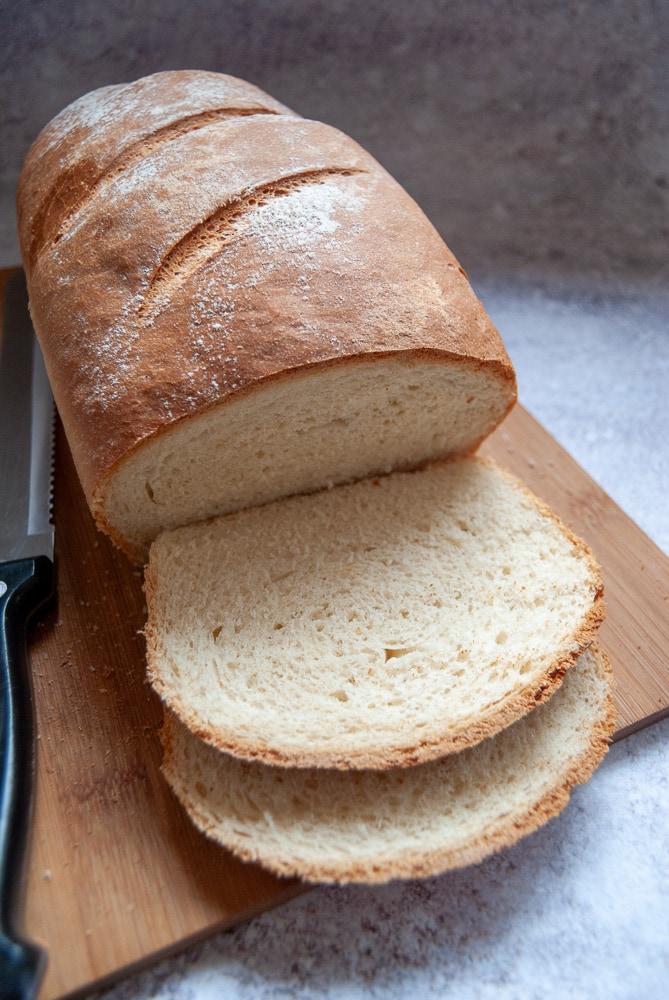
I’m delighted to say this loaf is anything but brick like – the crumb is soft, fluffy and is perfect for sandwiches. It also makes pretty amazing toast.
Looking for more bread recipes?
Foccacia Bread with thyme and cherry tomatoes
Soft white sandwich loaf

This soft white sandwich loaf is soft, fluffy and so easy to make - follow my tips and tricks for making the perfect loaf of bread.
Ingredients
- 500 g strong white flour
- 1x 7g sachet fast action yeast
- 7 g table salt
- 30 g butter
- 1 tbsp honey
- 325 ml milk
Instructions
- Grease a deep 900g (2lb) loaf tin with butter.
- Place the flour, yeast and salt in a large bowl and mix well.
- Place the milk, honey and butter in a saucepan and melt over a medium heat, stirring to melt the butter.
- Try not to let the mixture get too hot – you don’t want it to come to the boil. When the butter has melted, remove from the heat. If the mixture is too hot it may kill the yeast, so if necessary set it aside to cool down for a few minutes.
- Pour the lukewarm milk, melted butter and honey mixture into the flour, then mix with your hands or the mixer on low speed until you have a soft dough. If dry crumbs remain on the bottom, you might need to add a little more milk – a tablespoon at a time.
- Knead the dough by hand for about 10 minutes or about 5 minutes in a stand mixer, until the dough is very smooth, shiny and pliable. Return the dough to the bowl, cover and leave to rise for around 1-2 hours or until doubled in size.
- Punch down the dough to deflate (also very satisfying!) then turn it out onto a lightly floured worktop. Knead the dough lightly, then press it out to an even rectangle roughly 26 x 30cm.
- Roll up the dough tightly from one short end, like a Swiss roll, pinching the dough together as you roll. What you want to end up with is the dough in a sausage shape that will fit the length of your tin.
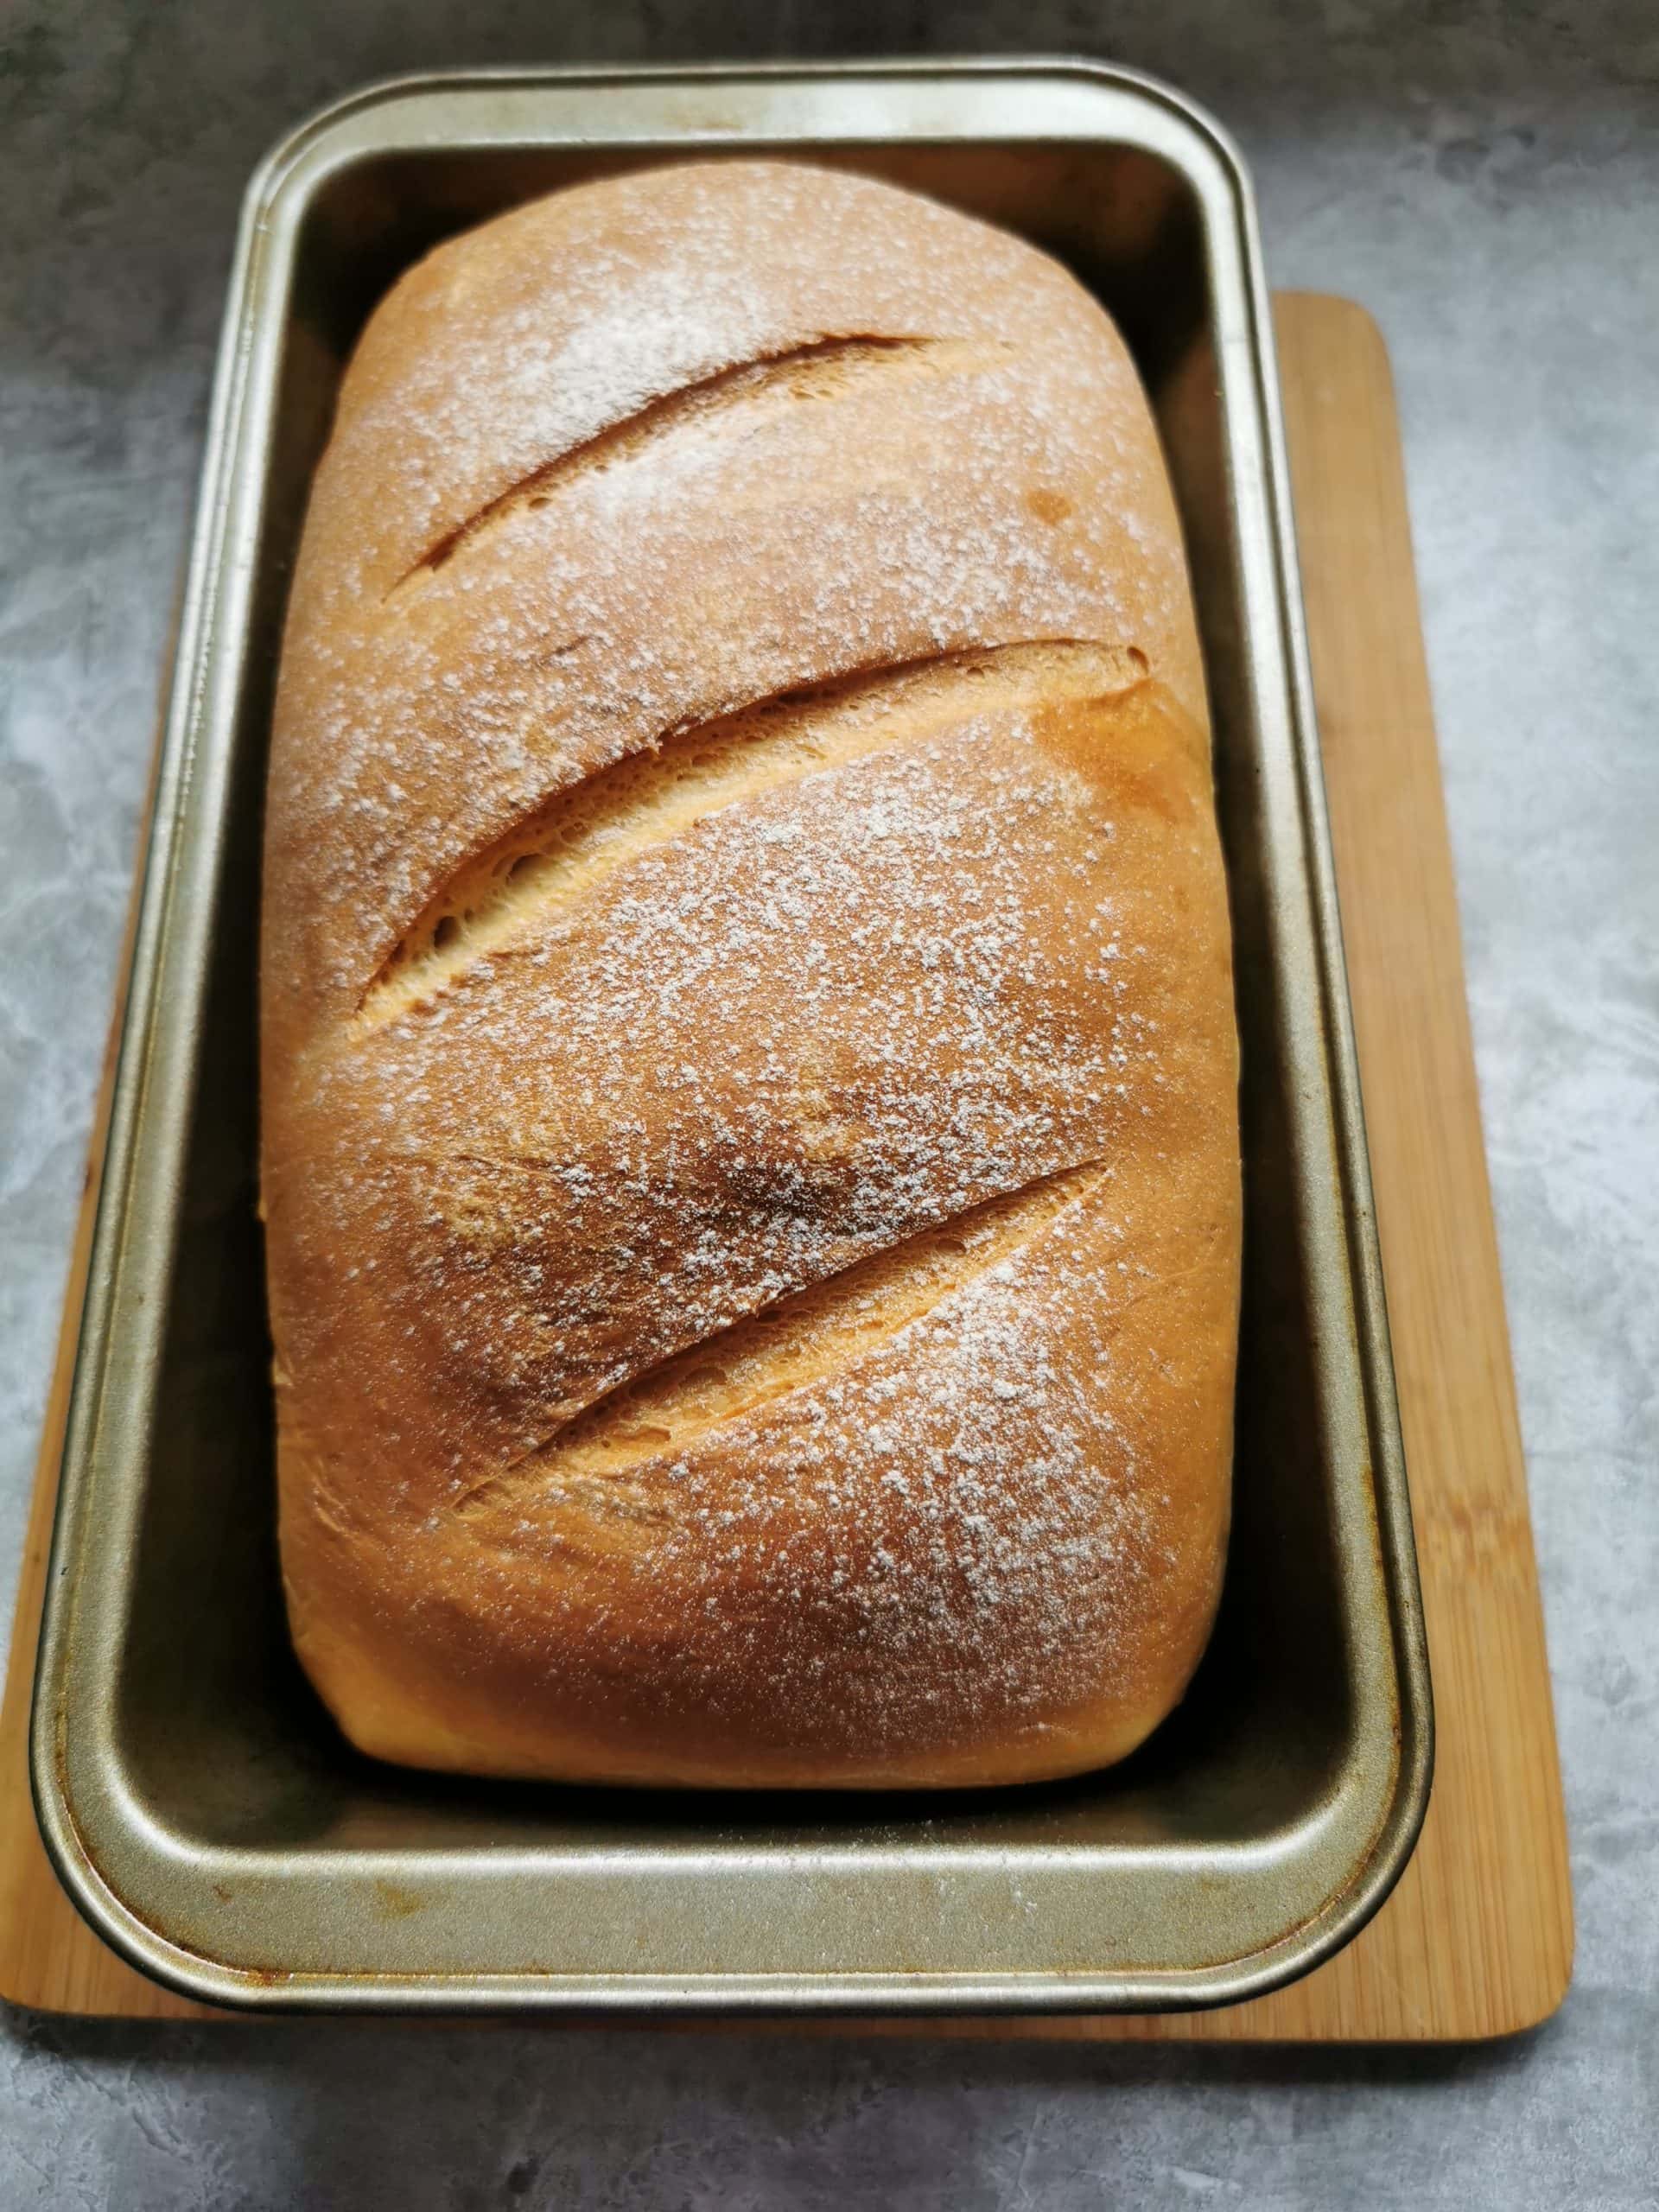
- Pinch the seam together (this will be the bottom of your loaf) then tuck the ends under and place the loaf in the tin. Leave for 40-45 or until well risen again. Preheat the oven to 200C/180Fan/400F. If you like a darker crust, Bake for 220C/200Fan for the first 10 minutes, then turn down to 200C.
- Lightly dust with flour and swiftly slash the dough 3 times using a very sharp knife or blade. Place in the oven and bake for 45-50 minutes. I always start checking after 40 minutes - carefully remove from the oven and using oven gloves, remove the loaf from the tin. Gently tap the bottom and if it sounds hollow, it's ready.
- Turn out the loaf onto a wire rack and leave to cool for a while before slicing, if you can resist!
Nutrition Information:
Yield:
10Serving Size:
1Amount Per Serving: Calories: 229Total Fat: 4gSaturated Fat: 2gTrans Fat: 0gUnsaturated Fat: 1gCholesterol: 9mgSodium: 310mgCarbohydrates: 42gFiber: 2gSugar: 2gProtein: 7g
I’ve never made bread before but this looks lovely and light. Thanks for sharing
Thank you! It has a very soft texture..and if you have some left after a couple of days and it’s gone a bit stale, it makes really lovely toast ?
You had me at bread! I am with you, nothing better than fresh baked bread 🙂
It’s one of the best simple pleasures! ?
I completely agree there are numerous benefits to making your own bread. I find it very rewarding and get a huge sense of accomplishment when I make my own bread. Your bread looks perfect – fluffy on the inside with a nice crust on the outside. Thank you for sharing with #CookBlogShare:)
What a delicious looking loaf of bread. I’m a huge fan of enriched doughs – they’re so lovely to work with but I have to admit that I’ve not done any bread making for quite some time (I sadly find that my wrists have a lot to say about kneading!) #CookBlogShare
Angela x
You’re very welcome, thank you! ?
Thank you! Kneading can be really hard going on your arms and wrists. I have to admit that more often than not, I use my mixer these days. It’s worth its weight in gold for this task alone!
I dont see a bake temp or time to bake.
Hi Marie, It’s 200C/180fan/400F for 45-50 minutes. I’ll fix that right away. Sorry about that, thanks for alerting me!